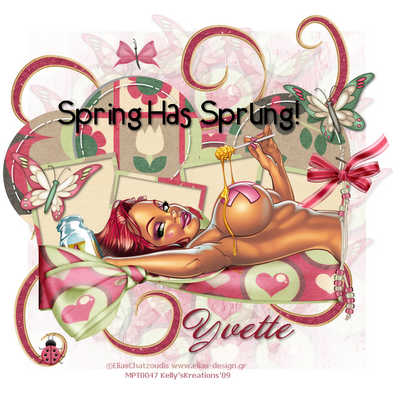
* Please click the tag to see the full size image.
This tag was created using PSP 7
Supplies Needed :
Tube of choice - I am using the awesome artwork of Elias Chatzoudis.
You can purchase his art HERE
I am using a fab PTU scrapkit by Laura(CinnamonScraps)
called 'Fresh' which you can purchase HERE
Template 67 by the talented Yvette HERE
Mask and Font of choice - I used AnnabelleJF TTF
Lets get started :0)
Open a new canvas 693*704.
Paste paper 14 as a new layer and apply a mask of choice. Lower the opacity to 90.
Open butterfly 4 from the kit. Effects - Muras meister - copies with the following settings :
5,50,50,0,0,0,100,0,100,0,0,30,0. Lower the opacity of this layer to 16.
Paste doodle 2 as a new layer and place at the top of the tag. Duplicate and mirror and place the 2nd doodle at the bottom of the tag. (Look at my tag for reference)
Merge all layers visable.
Now onto the template. Delete the copyright layer and the flower & butterfly layers.
Increase canvas size to 693 * 704.
Highlight circle 1 - select all - float & defloat. Paste paper 12 as a new layer.Selections - invert & delete. Select none. Do the same for the 3 ramaining circles. I used a different paper from the kit for each circle. ( circle2 - paper 10, circle 3 - paper 14, circle 4 - paper 9.
Highlight frame 1 - Select all - float & defloat - paste paper 8 as a new layer. Selections invert & delete. Selct none. Do the same for frame 2,3 and 4. (I used the same paper for each frame.
Highlight the square background. Select all - float & defloat - paste paper 1 as a new layer. Selections - invert & delete. Do the same for square background 2,3 and 4.
Copy and paste the merged layer that you created in the first step of the tut and place as a new layer. Move this layer to the bottom of the palette.
Copy & paste ribbon wrap 1 as a new layer. Place at the bottom of the square frames.
Paste your tube next. I used one that was laying down. Place on the top of the ribbon wrap.
(Look at my tag for reference)
Duplicate the ribbon wrap layer and move above the tube layer. Erase parts of the wrap so it looks like she is laying on it. Look at my tag for reference.
Highlight the wordart layer. I left it as it was. Just add a drop shadow.
Open the beadstring - resize to liking. Place at the right side of the tube. Duplicate and mirror.
Add bow 4 and place at the top of the beadstrings. Now you can add some more elements to dress up the tag. I added some butterflies and a ladybug from the kit.
Add your name and proper copyright info. Crop and save.
I hope you enjoyed this tutorial !
Please feel free to mail me your results.I'd love to see them :)
This tutorial was written by KellyKreations on March 08,2009.
Any resemblance to any other tutorial is purely coincidental.
Do not copy/rewrite or claim as your own.
©Kelly'sKreations2009


No comments:
Post a Comment